
You can send emails and SMS text messages to customers through your TripWorks account using Email & SMS Message Templates. These templates live within your Message Template Library, can be sent via Automated Messaging or Manual Messaging, and are available for editing at any time.
How to Edit a Message Template
Step 1: Find a Message Template to Edit
To edit a message template, you must first navigate to the desired template from your Message Template Library.
- From the toolbar, select More > Discover More
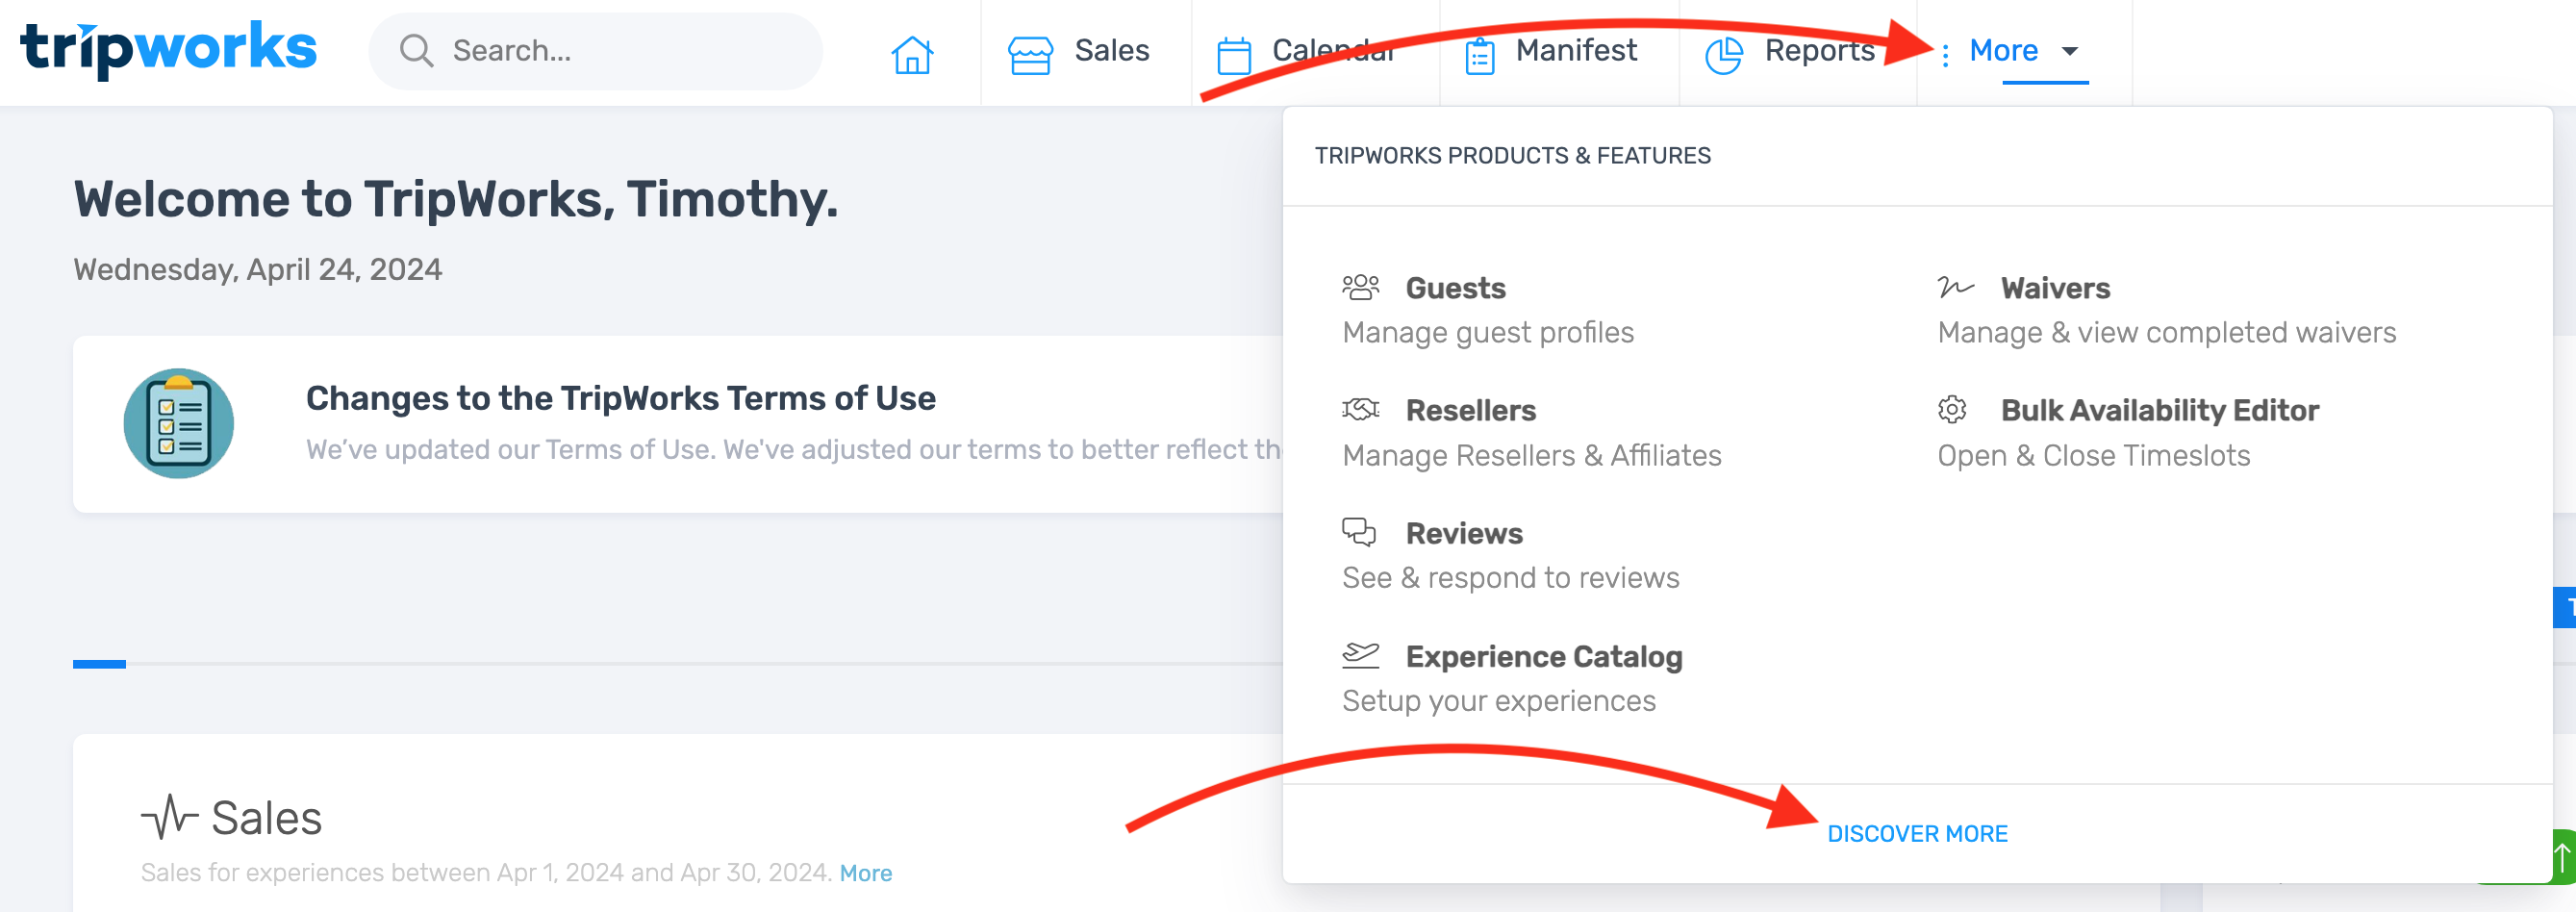
- Select Message Templates

- Select the template you want to edit. Upon selection, you will be directed to the Editor View of the message template

From the Editor View, you can perform a number of actions. Expand the items below for guidance, and be sure to Save any changes you make to your message templates.
Important Note
If you want your customers to receive a message via both email and SMS (text message), you must enable SMS delivery (for further instruction, skip to the section below titled "Enable SMS (text message) delivery for your message template"). If SMS delivery is not enabled, your message will be sent via email only.
Step 2: Add Your Message Content
Edit the subject line of your message template
- Click or tap the Subject Line portion of the template

- Replace the existing subject line with your desired text

- Save your changes if you're finished editing
Add text to your message template
- Click or tap the message body portion of the template.

- Add your desired content. (For content options and formatting tips, explore the other expandable items in this article.)

- Save your changes if you're finished editing
Add a button to your message template
- In the message body, insert the text you want to appear on the button

- Tap and hold, or use your device cursor to highlight the button text

- With the button text still highlighted, select the link icon
- Select Insert Link

- Provide the desired link, either by filling in the URL text field or by selecting an item from the Choose a Pre-Defined Link drop-down menu

or

- Select the Open link in new tab checkbox if you want the button link, when followed, to open in a new tab for users

- Select Insert to add your link
- Choose the Paragraph icon
- Select Button

- Your highlighted text should now be formatted to look like a button

- Save your changes if you're finished editing
Add a hyperlink to your message template
- In the message body, highlight the content you want to appear as the anchor text for your hyperlink

- With the anchor text still highlighted, choose the the Link icon
- Select Insert Link
- Provide the desired link, either by filling in the URL text field or by selecting an item from the Choose a Pre-Defined Link drop-down menu

or
- Select the Open link in new tab checkbox if you want the button link, when followed, to open in a new tab for users
- Choose Insert. Your anchor text should now be formatted as a hyperlink

- Save your changes if you're finished editing
Add an image to your message template
- In the message body, place your cursor where you want the image to appear
- Choose the Image icon to open the Image dialogue

- Select the desired photo as prompted by the Image dialogue box. Your image should appear where your cursor was previously located

- Save your changes if you're finished editing
Add a merge tag (autofill smart text) to your message template
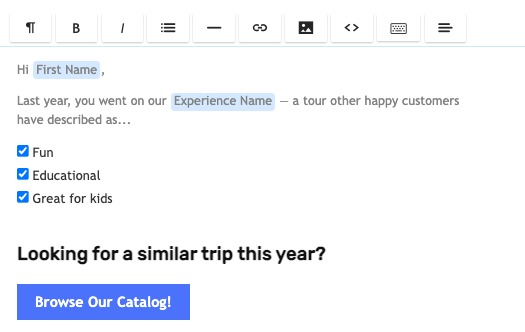
Merge tags allow you to populate your email and SMS messages with unique data — including customer contact information, booking details, activity details, payment history information, and much more. Once a message is sent, these items autofill with the correct details for the message recipient in question. For example, here is how a Refund Processed message might appear from your Message Template Library vs. how it appears to the message recipient:

Message as seen from your Message Template Library

Message as seen from the recipient's point of view
How to Add a Merge Tag to Your Template
- In the message body, place your cursor where you want the merge tag to appear.
- Select the Merge Tag icon to access your content autofill options

- Choose your desired merge tag. The content should appear where your cursor was previous located

- Save your changes if you're finished editing
Edit your message template using HTML
- Select the HTML icon to access the HTML view of your template

- Apply any changes you want to make to the HTML code
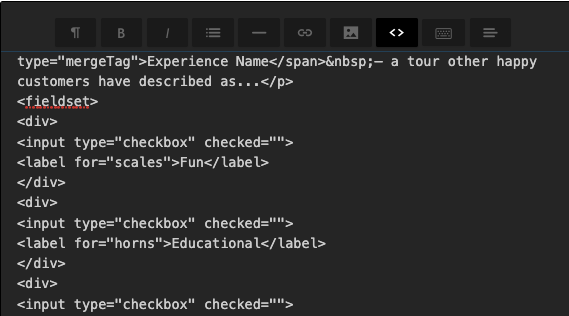
- Select the HTML icon again to preview your changes
- Save your changes if you're finished editing
Step 3 (Optional): Enable SMS (text message) delivery for your message template
If you want your customers to receive a message via SMS (text message), you must both:
- Add SMS content to your template, and
- Enable SMS delivery
Follow the instructions below to complete both components of enabling SMS delivery. This is an optional field; If SMS delivery is not enabled, your message will be sent via email only.
- Inside the Message Template editor, scroll down to the Enable SMS Delivery section and select Yes

- Place your cursor in the text field of the Enable SMS Delivery section that appears

- Add your desired content. (For content options and formatting tips, such as inserting hyperlinks or merge tags, explore the other expandable items in this article above.)

- Save your changes if you're finished editing
Step 4: Add Pre-Header Content to Your Message Template
A message template pre-header appears to the message recipient from their email inbox. It is intended to act as a concise, contextual preview of the message's content

- Scroll to the Pre-Header section
- Insert the desired content into the Pre-Header text field. Note that you can insert merge tags as desired.

- Save your changes if you're finished editing
Step 5: Assign the Message Template to a Category
Each template in your Message Template Library is assigned to a unique category. A template's assigned category impacts the automations available for use for that template.
For instance, if you have an “Event Reminder” message template in your library, but it is assigned to the User Defined Message category, you will not have the option to automatically send that message to customers when setting up your Event Reminder Messages within each activity. By assigning the template to the correct category (in this case, the Event Reminder category), you make it possible to enable the corresponding auto-send settings.
Visit Automated Messaging to learn more about message template categories.
- Scroll to the Category section
- Select a category for your message template from the dropdown

- Save your changes if you're finished editing