
A seat map is a visual layout of your tables or seats that lets you assign guests to a specific spot before or during check-in. Seat maps work well for:
In this article
- Dinner shows and luaus with assigned table seating
- Boat or bus tours with specific vehicle seats
- Events or attractions with reserved seating sections
- Any experience where guests need to be assigned to a specific seat or table
Learn how to manage permission groups
Seat maps are a visual seat management tool. They don't control your activity's capacity or availability settings. Set those separately so the numbers match; see Setting activity capacity limits.
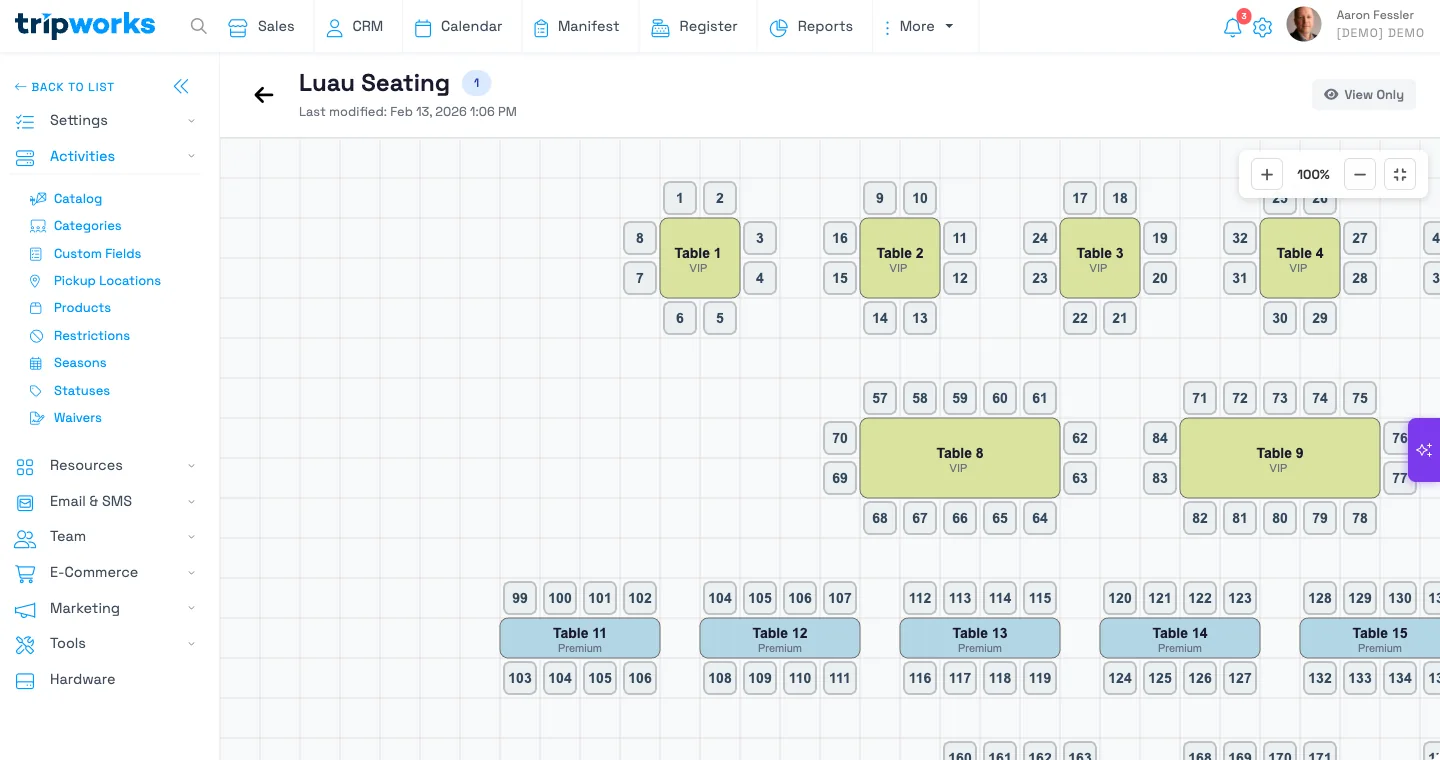
With seat maps, you can:
- Visually see which seats are available, occupied, or blocked
- Assign parties to specific tables or seats
- Block seats for maintenance or VIP holds
- Print seat tickets for guest check-in
Setting up a seat map
Step 1: Access the seat map builder
- Navigate to Settings → Seat Maps
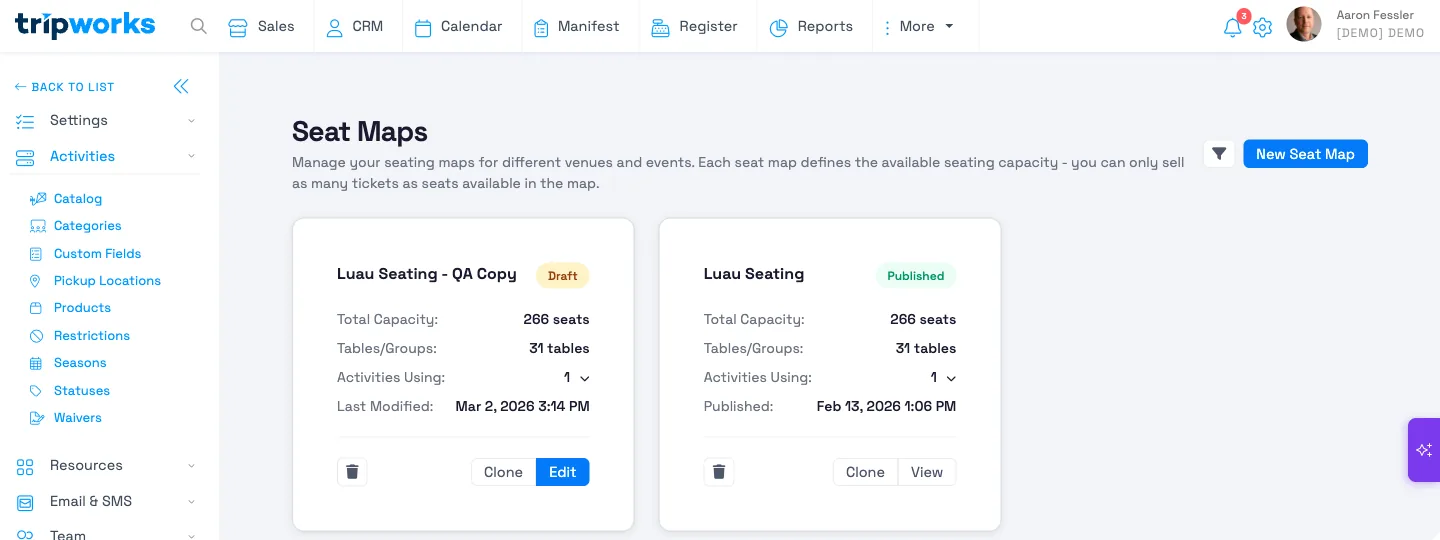
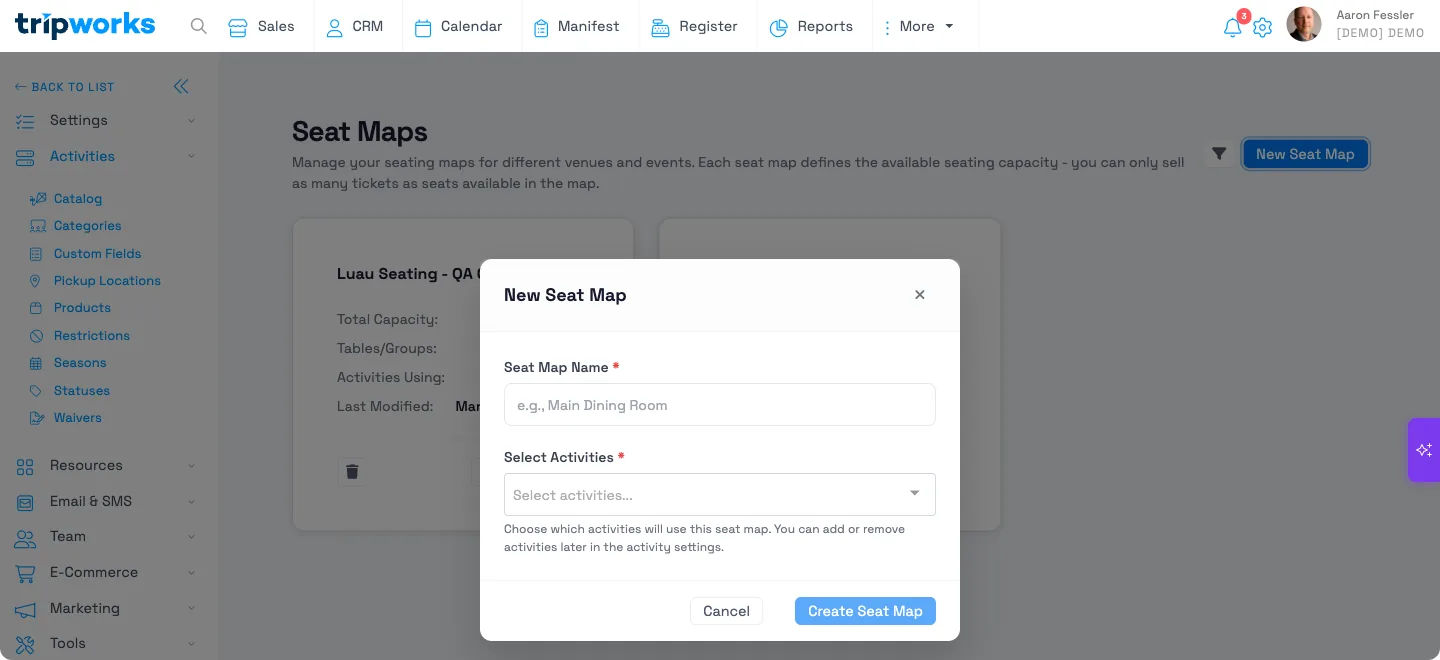
- Choose New Seat Map
- Enter a name (e.g., "Main Dining Room", "Tour Bus A") and select at least one activity to use it. You can add or remove activities later
- Choose Create Seat Map
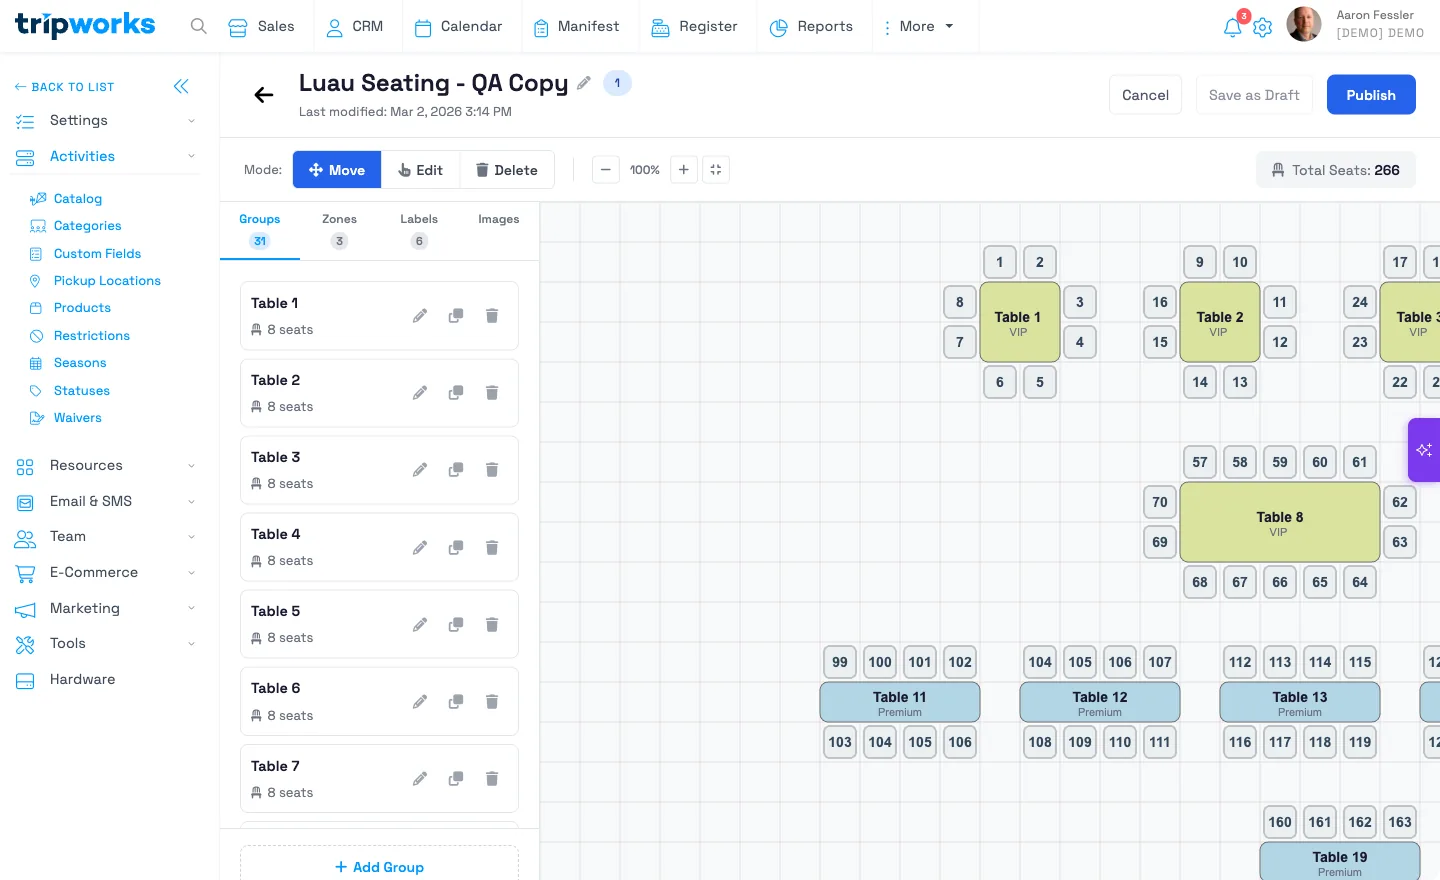
Step 2: Add tables or seat groups
- On the Groups tab, choose + Add Group
- Configure the group's name, shape, number of seats, and zone (optional)
- Drag the group to position it on the canvas
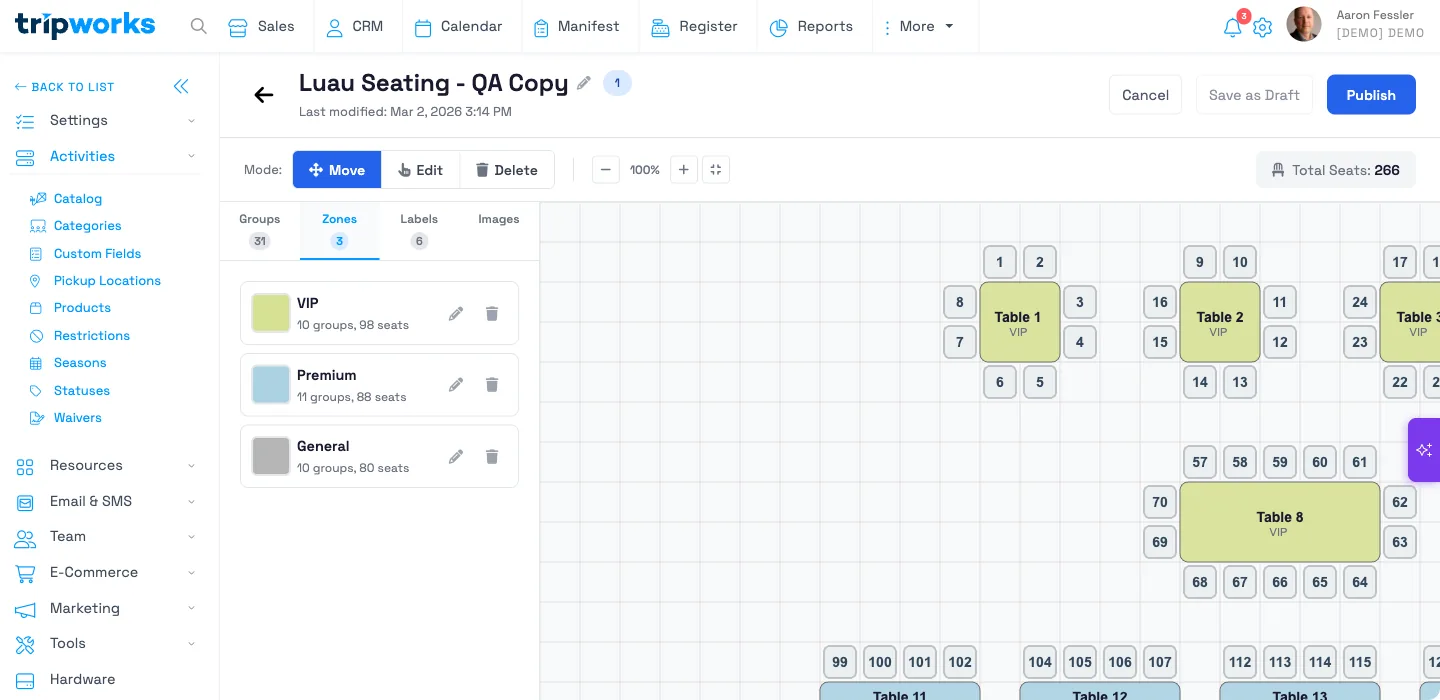
Step 3: Add zones (optional)
Zones help organize your seating into logical sections and color-code them on the canvas:
- Switch to the Zones tab and choose + Add Zone
- Enter a zone name (e.g., "VIP", "Premium", "General") and pick a color
- Repeat for additional zones, then assign groups to a zone from the Groups tab
Step 4: Add labels (optional)
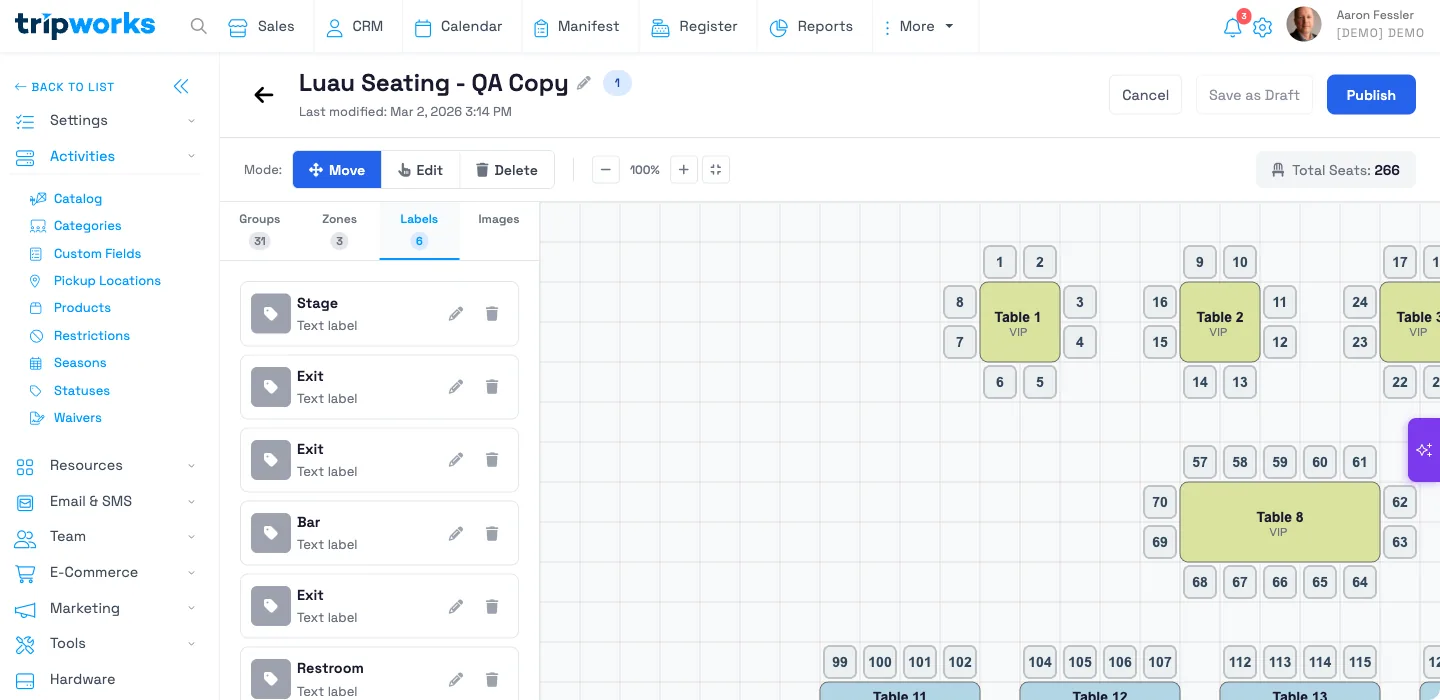
Labels are text markers (not seats) that help staff navigate the floor plan:
- Switch to the Labels tab and choose + Add Label
- Enter text (e.g., "Stage", "Exit", "Bar", "Restroom")
- Drag to position on the canvas
Step 5: Save and publish
- Choose Save as Draft to keep working on the layout later
- When ready, select Publish to make the seat map available for use
- Only published seat maps can be connected to activities
Once you publish a seat map, it's locked. You can't edit its zones, tables, or seats anymore. If you need to change a published layout, use Clone to make an editable draft copy (the clone doesn't carry over the original's activity connections, so you'll need to reconnect it), then publish the clone and switch your activities to it.
You also can't delete a seat map that's published, or one that's ever had a seat assigned on it. Use Archive instead in either case. See Troubleshooting seat maps if a seat map's Delete option is greyed out.
Tips for seat map design
- Use consistent naming: Number tables sequentially (T1, T2, T3) for easy reference
- Create zones for pricing tiers: Group VIP, Premium, and Standard sections
- Leave space between groups: Makes the visual layout easier to read
- Match your physical layout: Arrange tables as they appear in your actual venue
Connecting a seat map to an activity
You pick the activities from inside the seat map itself, not from the activity's own settings:
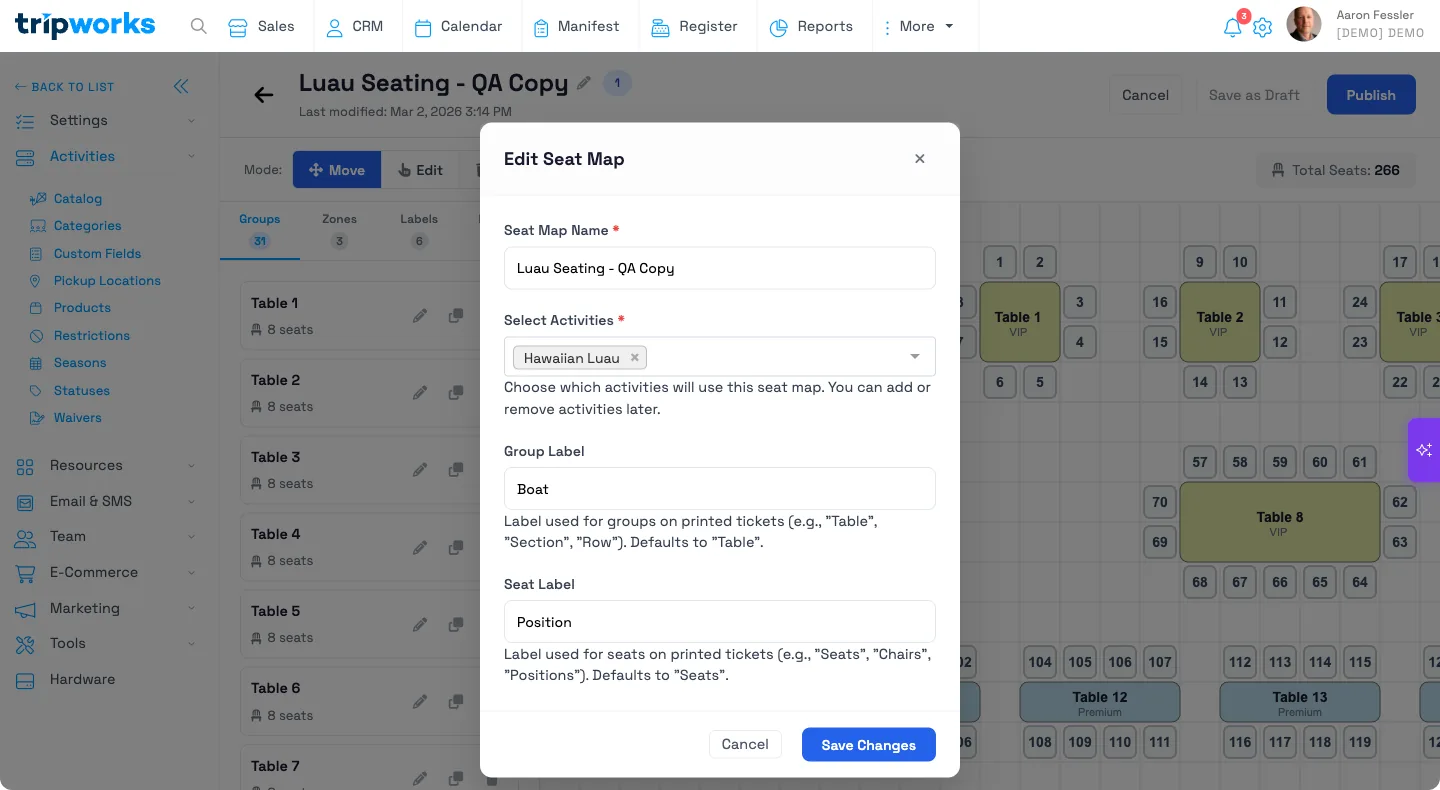
- Open the seat map (draft or published) and select the pencil icon next to its name
- In Select Activities, add or remove the activities that should use this seat map
- Optionally set a custom Group Label and Seat Label (e.g. "Boat" / "Position" instead of the defaults "Table" / "Seats"). These print on seat tickets
- Choose Save Changes
At least one activity is required. You can't save a seat map with no activities attached, and one seat map can be shared across multiple activities that use the same physical space.
A seat map's seat count isn't checked against the activity's ticket capacity. They're two independent settings. Keep them in sync yourself, or guests can book past the number of physical seats. See Setting activity capacity limits.
Seat maps apply to bookings made through your storefront or entered manually — they aren't assigned automatically for OTA/reseller (Viator, GetYourGuide, and similar) bookings. Those bookings still show up in the Manifest and can be seated manually like any other; if an OTA booking is cancelled or rebooked, its seat is automatically freed.
Example uses
- Build a seat map for a sunset dinner cruise with a "VIP" zone at the bow and a "Standard" zone toward the stern
- Create a luau seat map with round tables named T1–T12 and a "Stage" label so staff know which way tables face
- Add a "Wheelchair Accessible" zone so front-of-house staff can see accessible seating at a glance
- Clone a published seat map to rearrange tables for a private event, then reconnect it to that one-off activity
FAQ
Do seat maps control how many tickets I can sell?
Can I edit a seat map after I publish it?
Why can't I delete my seat map?
Can one seat map be used by more than one activity?
Do seat maps work for OTA bookings from Viator or GetYourGuide?
What's the difference between a zone and a group/table?
Next, learn how to assign guests to seats from the Manifest once your seat map is connected to an activity.
Want a hand setting up seat maps?
Talk to our team
We'll help you design a seat map that matches your venue.