
Resources are tangible items that your team owns or has access to and may choose to assign to customers before, during, or after an activity. For instance, your resources may include kayaks and life jackets, as well as seats on a bus used to transport your guests.
In order to Automatically Assign Resources to Activities, you will need to ensure that your resources are added to your dashboard and added to a resource group. This article provides guidance on these requirements.
Video Walkthrough
What is a Resource Group?
A resource group is a collection of resources that have been grouped together to ensure accurate, streamlined resource allocation during the booking process. Think of each resource group like a supply rack in a shed. Instead of saying "Go get a kayak" to your employee, you can eliminate error by saying "Grab a 2-person kayak from the 2-person kayak rack." In the same way, creating specific resource groups allows you to tell the platform exactly which pool of resources to pull from for each unique booking scenario.
How to Create a Resource Group
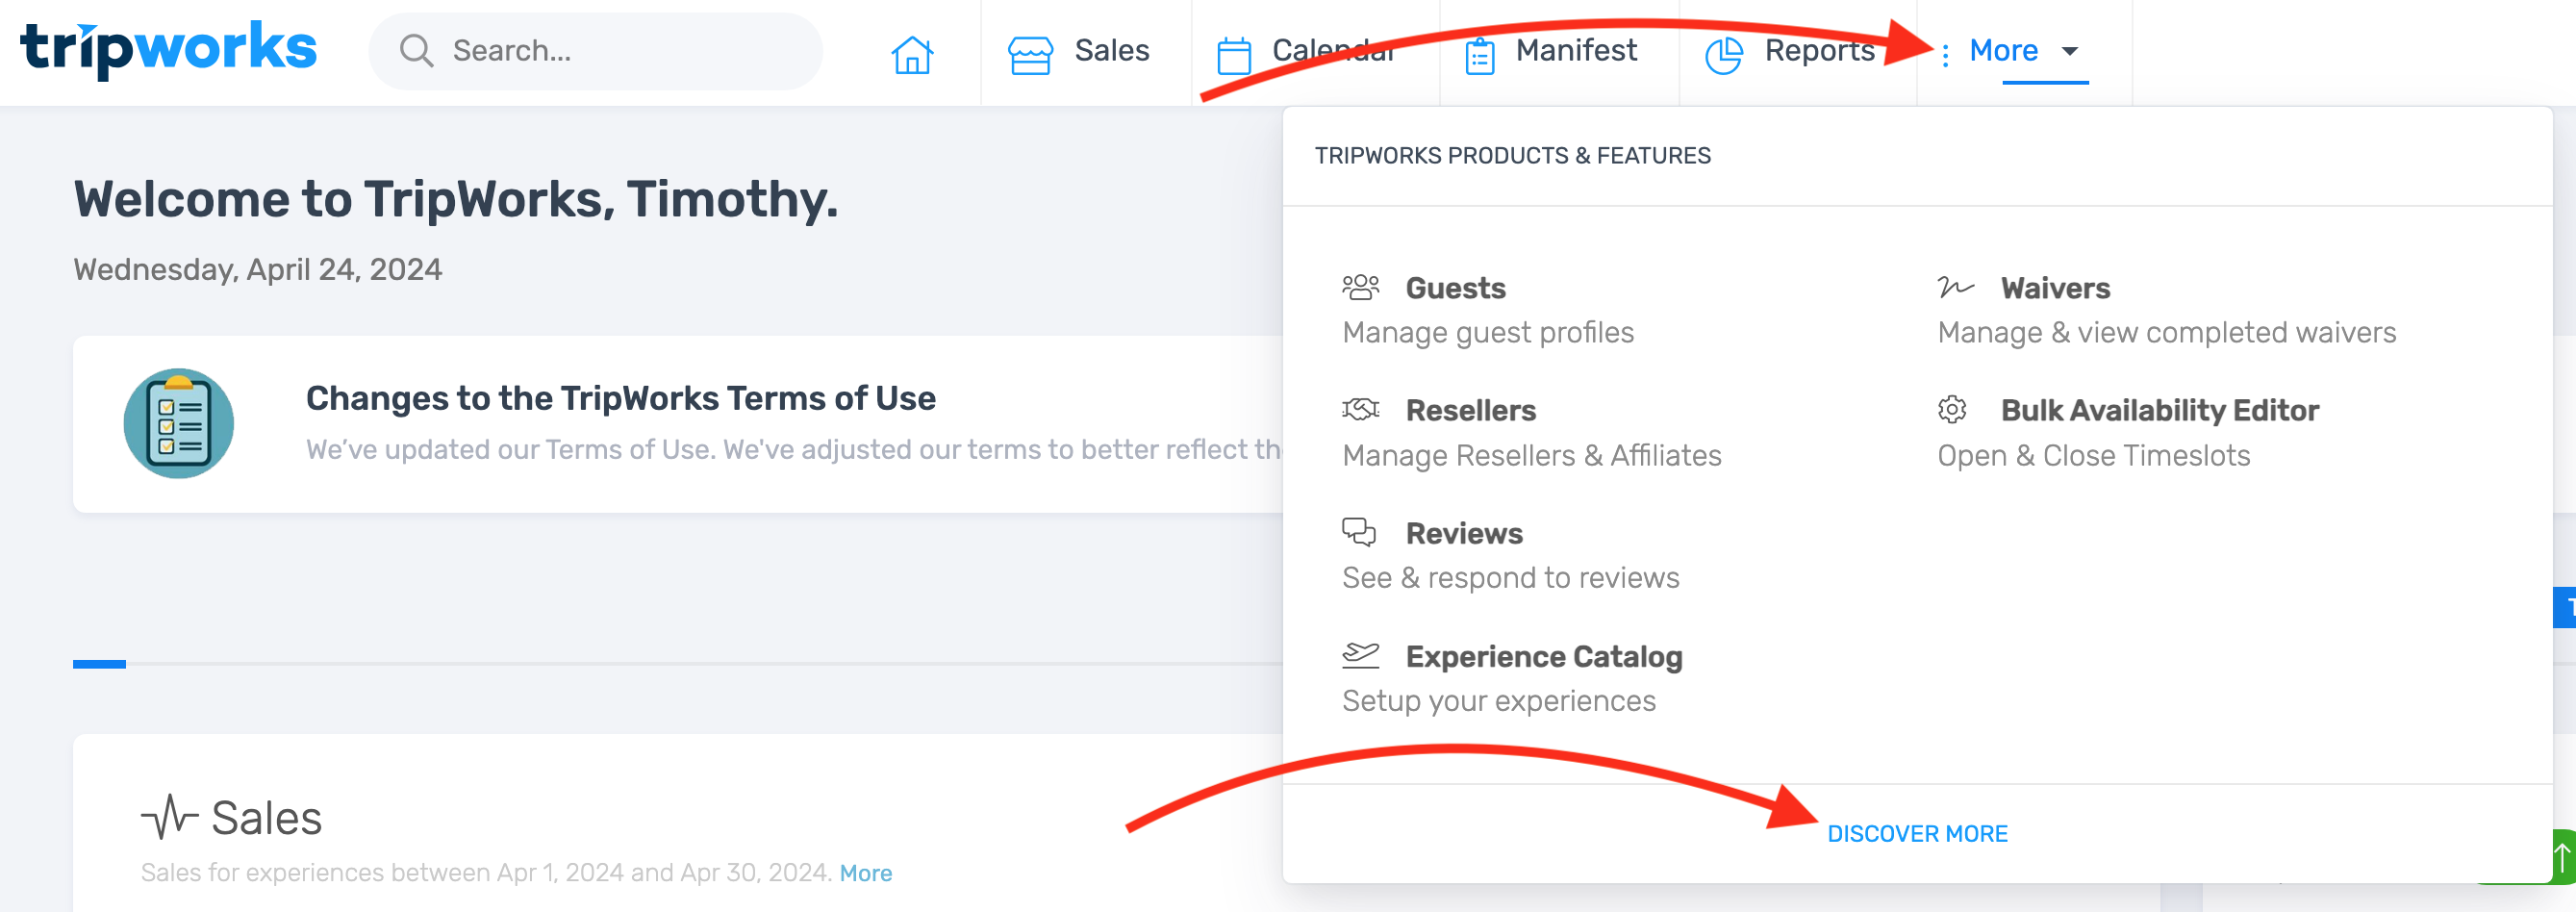
- Select More > Discover More from the toolbar
- Select Resources

- Under the Resource Groups tab, select Create a Resource Group

- Add a Singular and Plural name for your Resource Group
-
Select whether or not your Resource Group represents physical items or a group of indivudals
- Physical Items: Select this option for kayaks, paddle boards, bikes, scooters etc.
- Group of Individuals: Select this option if you're setting up a work group for guides, instructors, pilots, captains etc.

-
Select Save
Want to learn more about Work Groups?
Work Groups let you organize team members into groups like guides, pilots, and instructors. Learn more about How to Set Up and Manage Work Groups.
How to Create Resources Within a Resource Group
Once your resource groups are in place, you will need to assign at least one resource to each group.
- From the Resources tab, select Create a Resource

- In the Create a New Resource dialog box, enter a Resource Name
- In the Shared Pool drop-down menu, select the resource group to which this resource belongs

- In the Max Uses field, specify how many people can use this resource at one time

- If you have a preference regarding the order in which your resources appear from the Manifest Timeline view, fill in the Sort Order field. For instance, if you want the adult harnesses that have been assigned for a booking to appear above any other resources that have been assigned for that same booking, you would input a "1" in the Sort Order field. For the next resource you add, you would input a "2" — and so on

- Select a resource Display Color. This color appears on your Manifest Timeline and Calendar view. It's a nice way to customize the visuals within your account

Pro Tip
Bright colors do not translate well when looking at resources on your manifest timeline or calendar view. Make sure to choose darker colors for better visuals.
- In the Number of Resources field, input how many resources of this kind you have available for use (e.g. Have 5 adult harnesses? Input "5".). Doing so will automatically generate numbered entries of the same resource when you select the Create button

↓

- Select the Create button when you're finished to save your changes
How to Change a Resource Icon
To customize the appearance of your resource, you can select a preferred icon that will be displayed on both the manifest and in booking views. Follow these steps to update the icon for your resource:
- From the Resources tab, select the resource
- In the Icon dropdown menu, choose your preferred icon


- Choose Save