
Seasonal pricing refers to special pricing rates that apply to a specific time period. In your TripWorks dashboard, you will find that the seasonal pricing settings are extremely flexible, allowing you to apply unique rates to:
- One specific date (e.g. Halloween, Labor Day, Arbor Day)
- A specific date range (e.g. Memorial Day Weekend, Spring Break)
- Certain day(s) of the week (e.g. Discount Tuesdays, Thrifty Thursdays)
- Specific times of day (e.g. Happy Hour)
-
Any combination of the above (e.g. Half-priced tours from 10:00 a.m. to 4:00 p.m., Mondays-Thursdays only, all summer long)
Please Note
Seasonal and other Dynamic Pricing rules are applied automatically when triggered during the booking process only. If you want to adjust the ticket prices for a trip that has already been booked, see Comp, Uncomp & Reprice Tickets.
Set Up Seasonal Pricing
There are two key components to creating seasonal pricing:
- Define the season for which you want your unique price rate to apply
- Associate the season you've created with the desired activity
Review the video walkthrough and written instructions below for a detailed look at these components
Step 1: Define Pricing Seasons
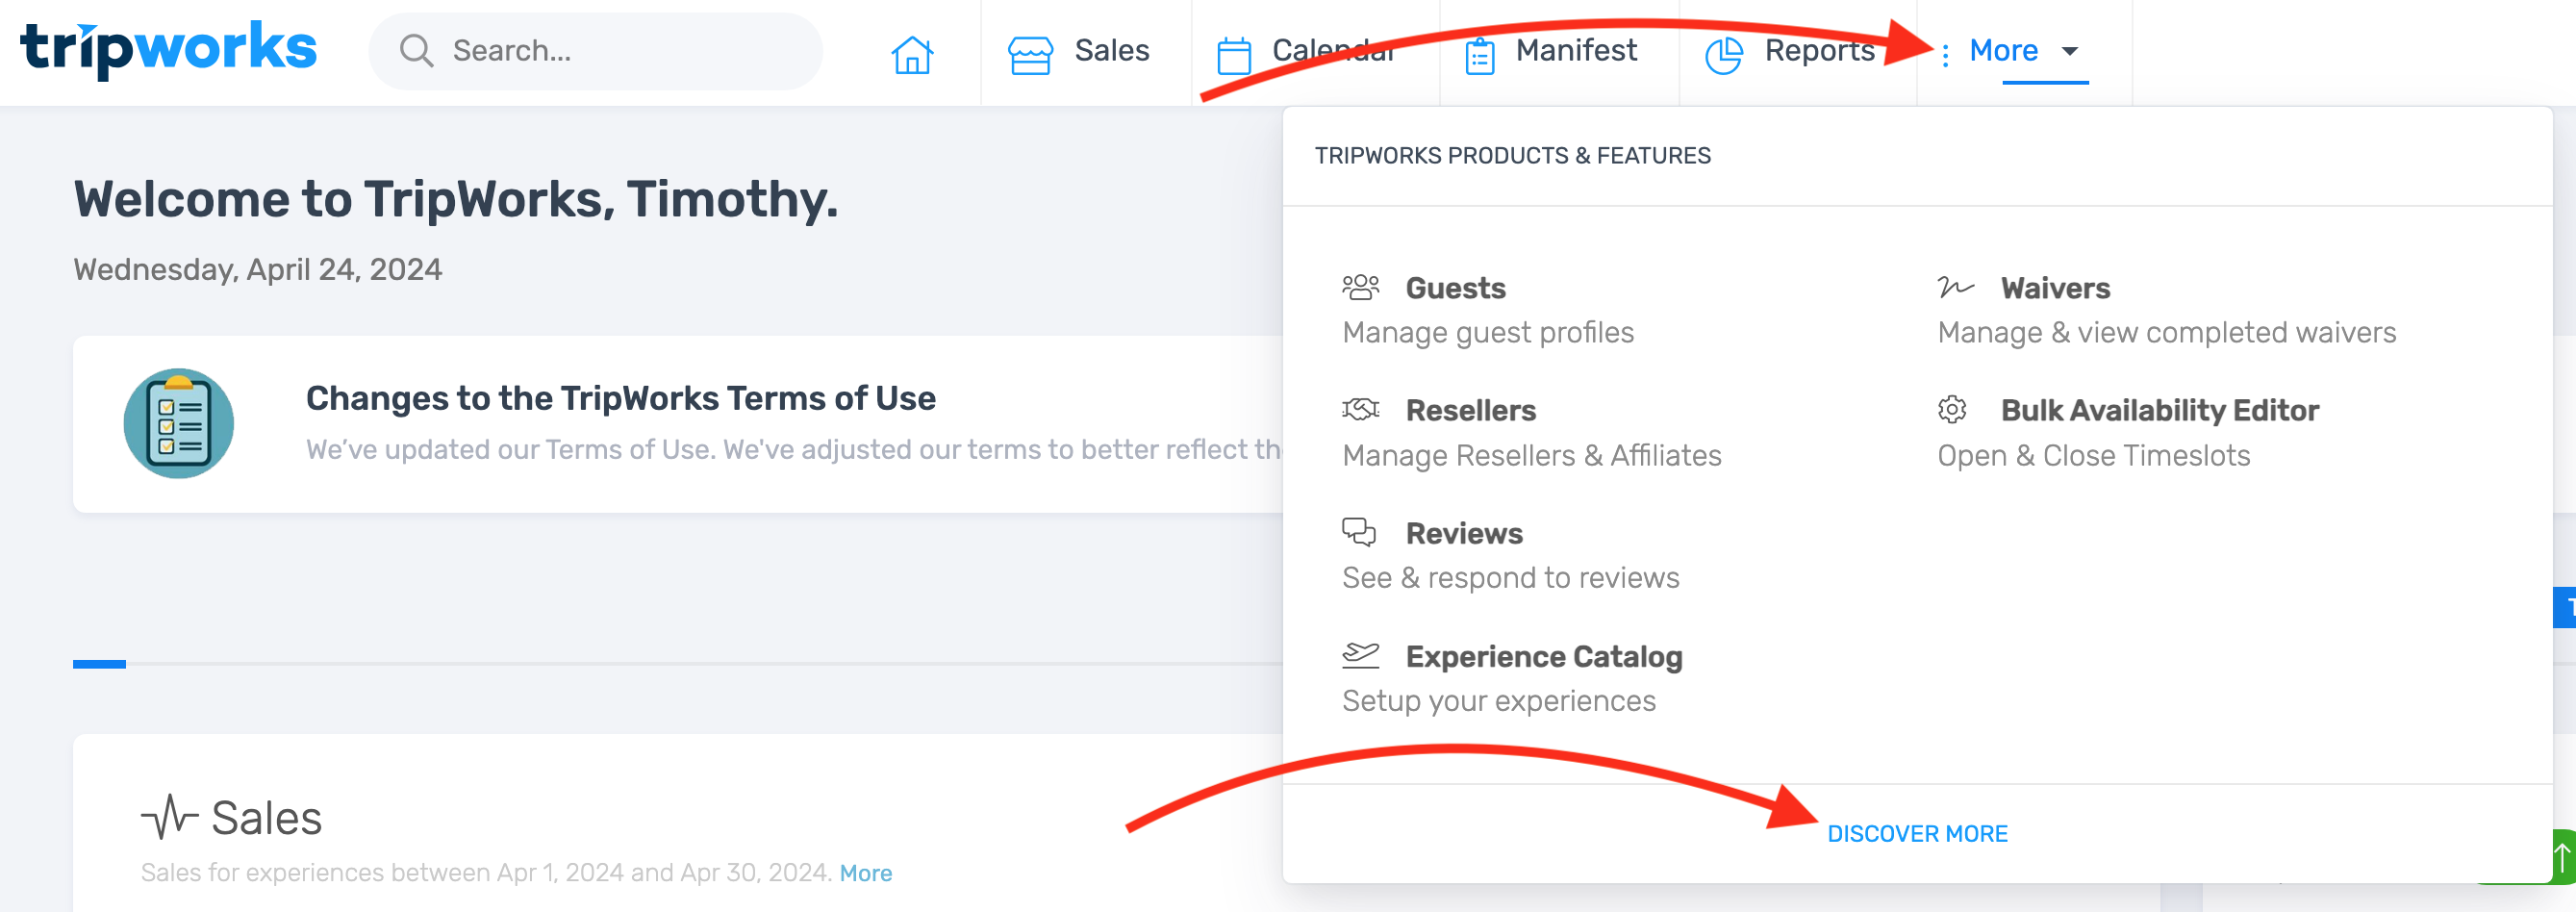
- Select More > Discover More from the toolbar
- Choose Seasons under the Activity Catalog category

- Select Add Season

- Give your season or event a fitting name, then choose Create Schedule

-
Select the dates, days of the week, and time frame for which you want your season to apply. For example, you may want to select:
A single date

A date range

Specific day(s) of the week

A specific time of day

- Be sure to Save your work
Step 2: Associate Pricing Seasons with Activities
- Navigate to the desired activity by selecting More > Activity Catalog from the toolbar

- Select an activity from the list
- Select Ticket Prices from the sidebar menu

- Choose Add Rate Sheet

- Give your new rate sheet a fitting name, then choose Create Rate Sheet

- Select the rate sheet you have just created
- Select the Criteria tab

- Navigate to the first dropdown titled During Seasons
- Choose Limit to timeslots on a schedule
- Select your desired pricing season from the second drop-down menu

- As needed, customize your criteria further in the Limit by Passenger Count, Availability Limits, and/or Advance Window Limits sections. To learn more about these additional settings, see Dynamic Pricing
- Select the Channels tab

- Select the channel(s) through which you want this unique pricing to apply
- Select the Settings tab
- Set your rate sheet to Live

What do the stauses mean?
- Draft - If you want to save this rate sheet for later but not apply its price settings yet
- Live - If you are ready to apply these price settings now
- Archived - If this is an existing rate sheet that you no longer wish to apply
- If you plan to associate more than one seasonal or other dynamic pricing rule with this activity — and if those rules contain overlapping criteria — you will need to rank your rate sheets using the Priority field.. This field tells the platform which pricing rates to apply when a booking meets the criteria of more than one rate sheet. For details and examples, see What is the purpose of the Priority field for rate sheets?

- Set the prices you want applied to each ticket type whenever your new rule is triggered

- Choose the Save button