
The TSP654II AirPrint Receipt Printer lets you print paper receipts from Apple devices over your WiFi network. It also integrates with a cash drawer — selecting Print inside a trip will open the drawer automatically.
This guide covers initial hardware setup: connecting the printer to your network and adding it to your device.
What you will need
From the manufacturer:
- TSP654II AirPrint Receipt Printer
- Star AirPrint guide sheet (included in the box — contains your login credentials)
From you:
- Ethernet cable (for initial setup only)
- Internet-connected router
Set up the printer
- Plug in the printer. While holding the Feed button, switch the printer on. Release the Feed button once it powers up.
- Connect the printer to your router using the Ethernet cable.
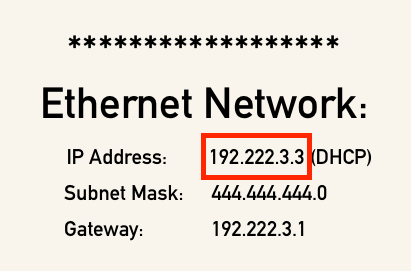
- The printer will automatically print two sheets. The second sheet shows your IP address under Ethernet Network — note this down.
- On any device, open a browser and enter that IP address. The Star AirPrint login screen appears.

- Log in using the username and password from your Star AirPrint guide sheet.
- Select Wireless Connection, then log in to your WiFi network.
- Click Save, then Execute.
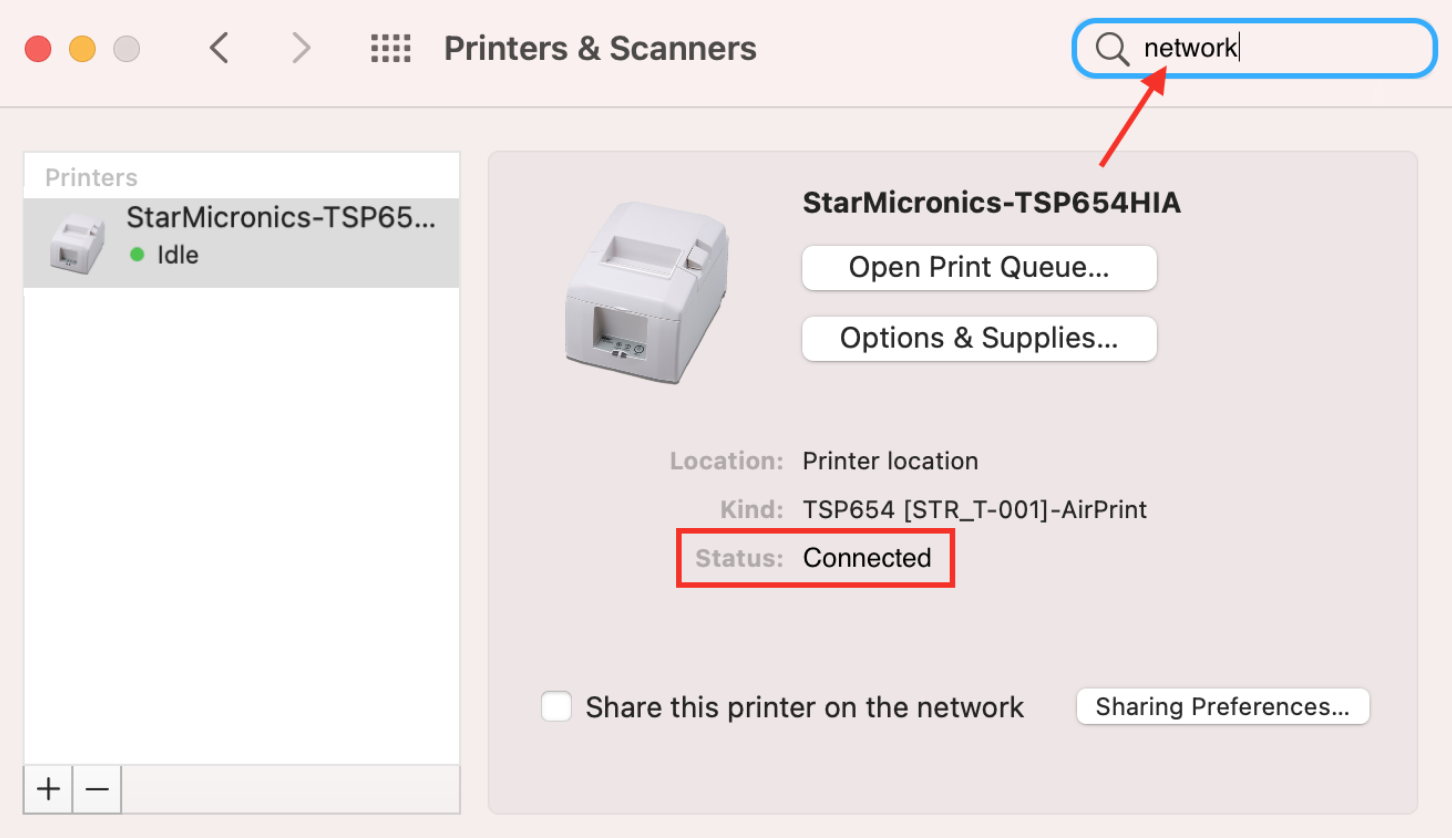
- Verify the printer is connected: open System Preferences on your device and check Network — a properly configured printer shows a Connected status.
- Once connected, unplug the Ethernet cable.
- Add the printer to your device through your system printer settings.

The printer is now ready. Open any trip in TripWorks and select Print Receipt — the TSP654II will appear as a print target on any Apple device connected to the same network.
Next steps
If you want receipts to print on a single page from a Mac desktop, see Single-Page Receipts (Mac Desktop) for CUPS driver setup.