
Once you have Set Up Your TSP654II AirPrint Receipt Printer, you may opt to update your printer settings so that your receipts print on a single page. This process can only be done from a desktop computer and involves two key components:
- Identifying your printer's IP address
- Connecting your device with the CUPS driver
What is CUPS?
CUPS is a network printing system that allows Mac users to connect their Mac devices with various printers and print settings. Before you can select the single-page print setting ("TSP650 Cutter") you first need to ensure CUPS is properly configured with your device.
How to Set Up Single-Page Receipts
Step 1: Identify Your Printer's IP Address
- Power the printer OFF
- Hold down the Feed button while powering the printer back ON.
-
Once the printer is on, release the feed button. This will cause the printer to print two items:
- A page with switch and memory details.
- A page with configuration details.
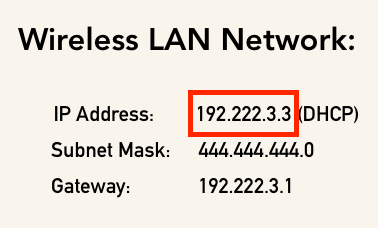
- At the bottom of the second page, you will find the printer's IP address under Wireless LAN Network
Step 2: Connect Your Device with the CUPS Driver
- From the Star Micronics CUPS Driver for macOS page, download the CUPS driver. To do this, select the Download button and follow the corresponding prompts to complete the download process
- On your Mac desktop device, navigate to your printer settings by selecting or searching for System Preferences
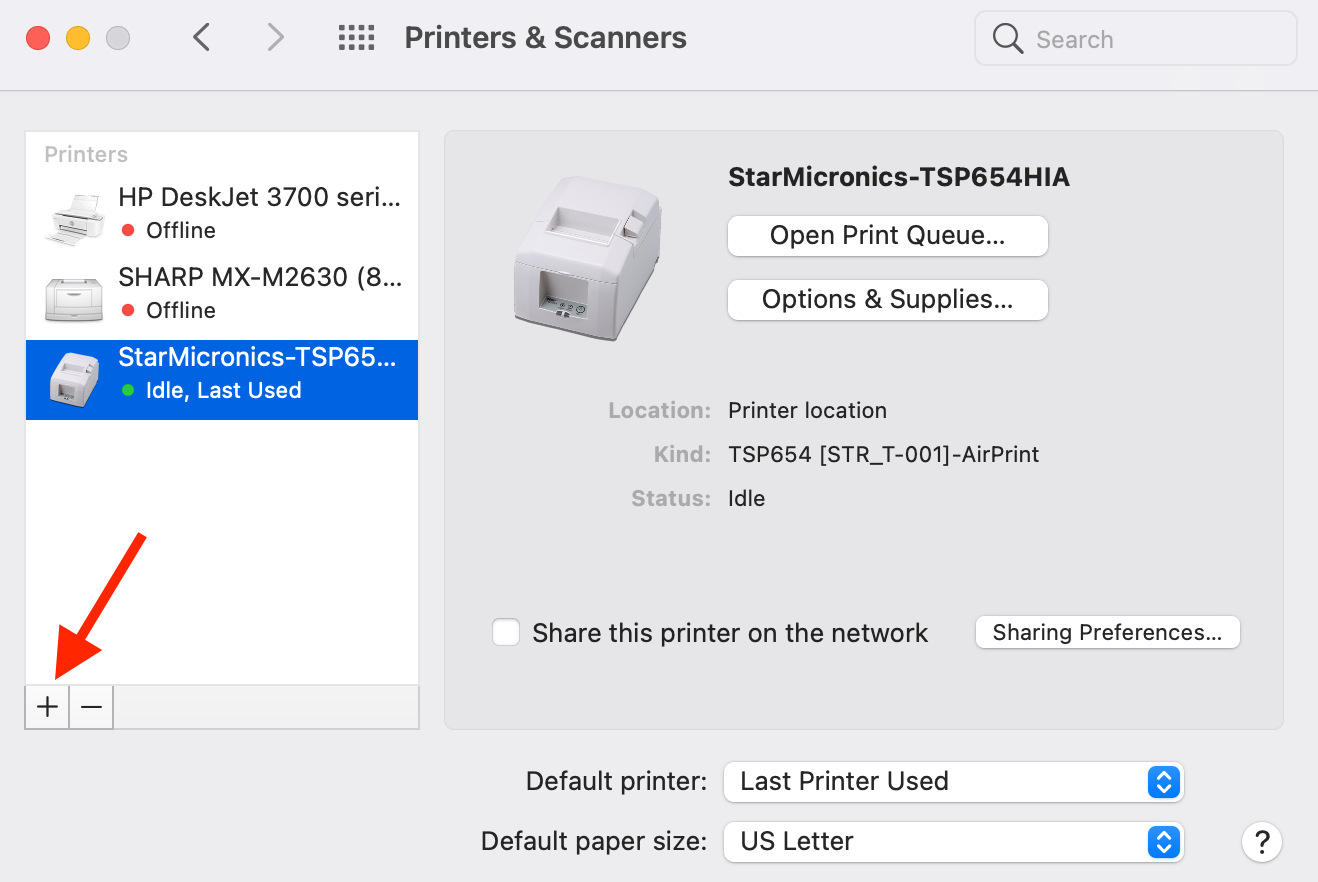
- Select Printers & Scanners

- In the Printers & Scanners dialogue box, select the add (+) icon
- In the Add Printer dialogue box, select the network icon, then enter the printer’s IP address into the Address field
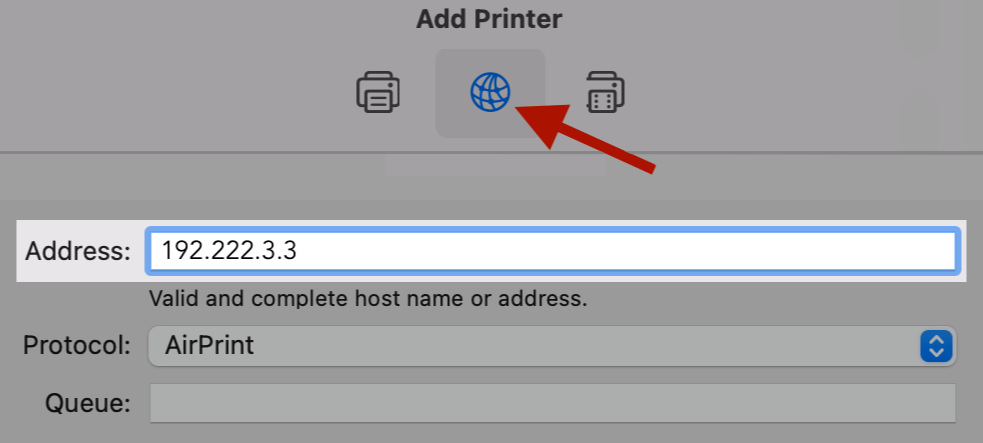
- From the Protocol drop-down menu, choose HP Jetdirect - Socket

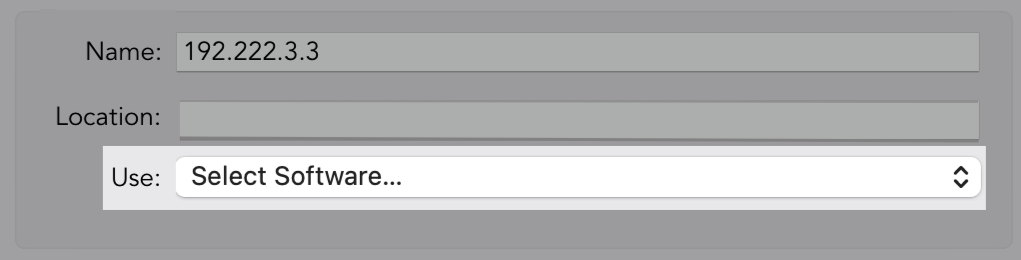
- From the Use drop-down menu, choose Select Software. This will open the Printer Software dialogue box.
-
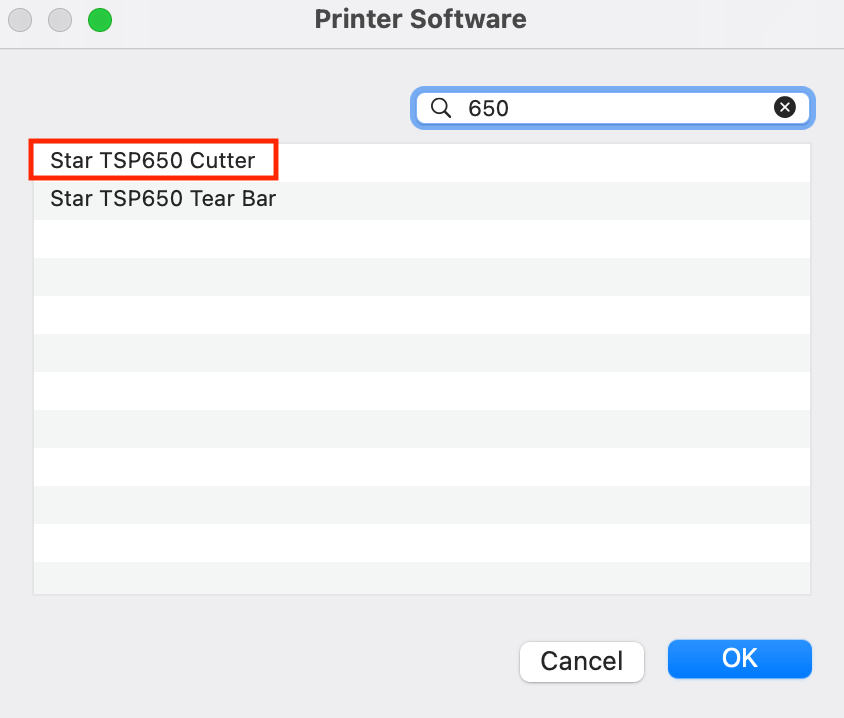
In the Printer Software dialogue box:
- Search for 650
- Choose TSP650 Cutter (Note: If you cannot find the TSP650 Cutter option when searching printer software, make sure you have downloaded the CUPS driver from the CUPS Driver for macOS page.)
- Once installed, you will see the option for TSP650 Cutter
- Select OK. This will bring you back to the Add Printer dialogue box
- In the Add Printer dialogue box, select Add to confirm your settings
Your printer is now configured to print one-page receipts.