The VQuip integration in TripWorks automates the transfer of reservation data post-checkout, ensuring accurate customer and booking details for rental protection. This integration helps you streamline insurance verification and manage risk for land, water, and snow-based rental vehicles and equipment.
How to Set Up The VQuip Integration
Step 1: Create a VQuip Account
If you don’t have an account yet, sign up for VQuip to get started. You’ll need an active account to enable the integration.
Step 2: Request API Credentials
To connect TripWorks with VQuip, request your API Client Credentials (Client ID and Secret) by contacting your VQuip Account Manager. They will verify your account and provide the necessary details for API access.
Step 3: Enter API Credentials in TripWorks
Once you receive your API credentials, follow these steps to enter them into TripWorks:
- Log in to your TripWorks dashboard
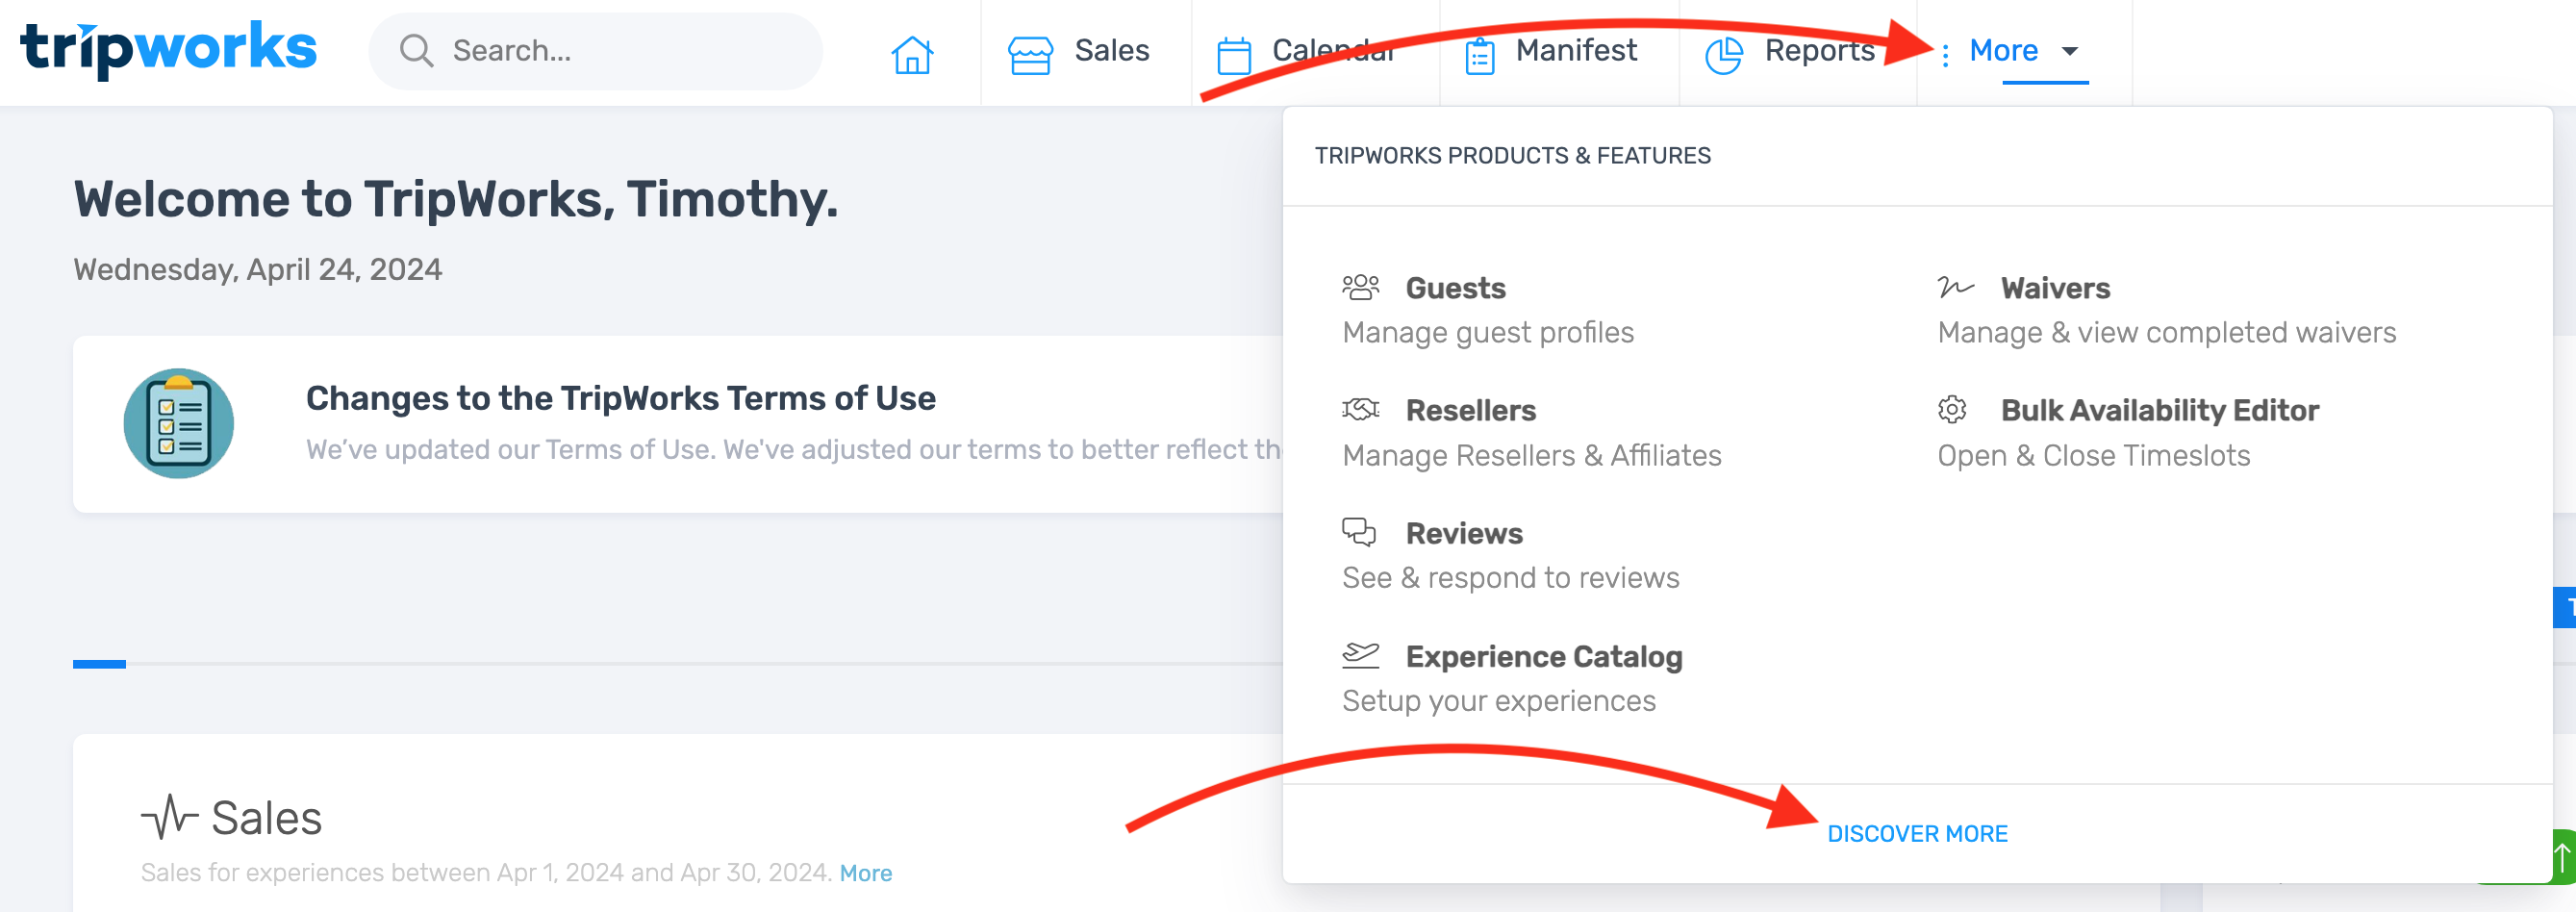
- Select More > Discover More the toolbar

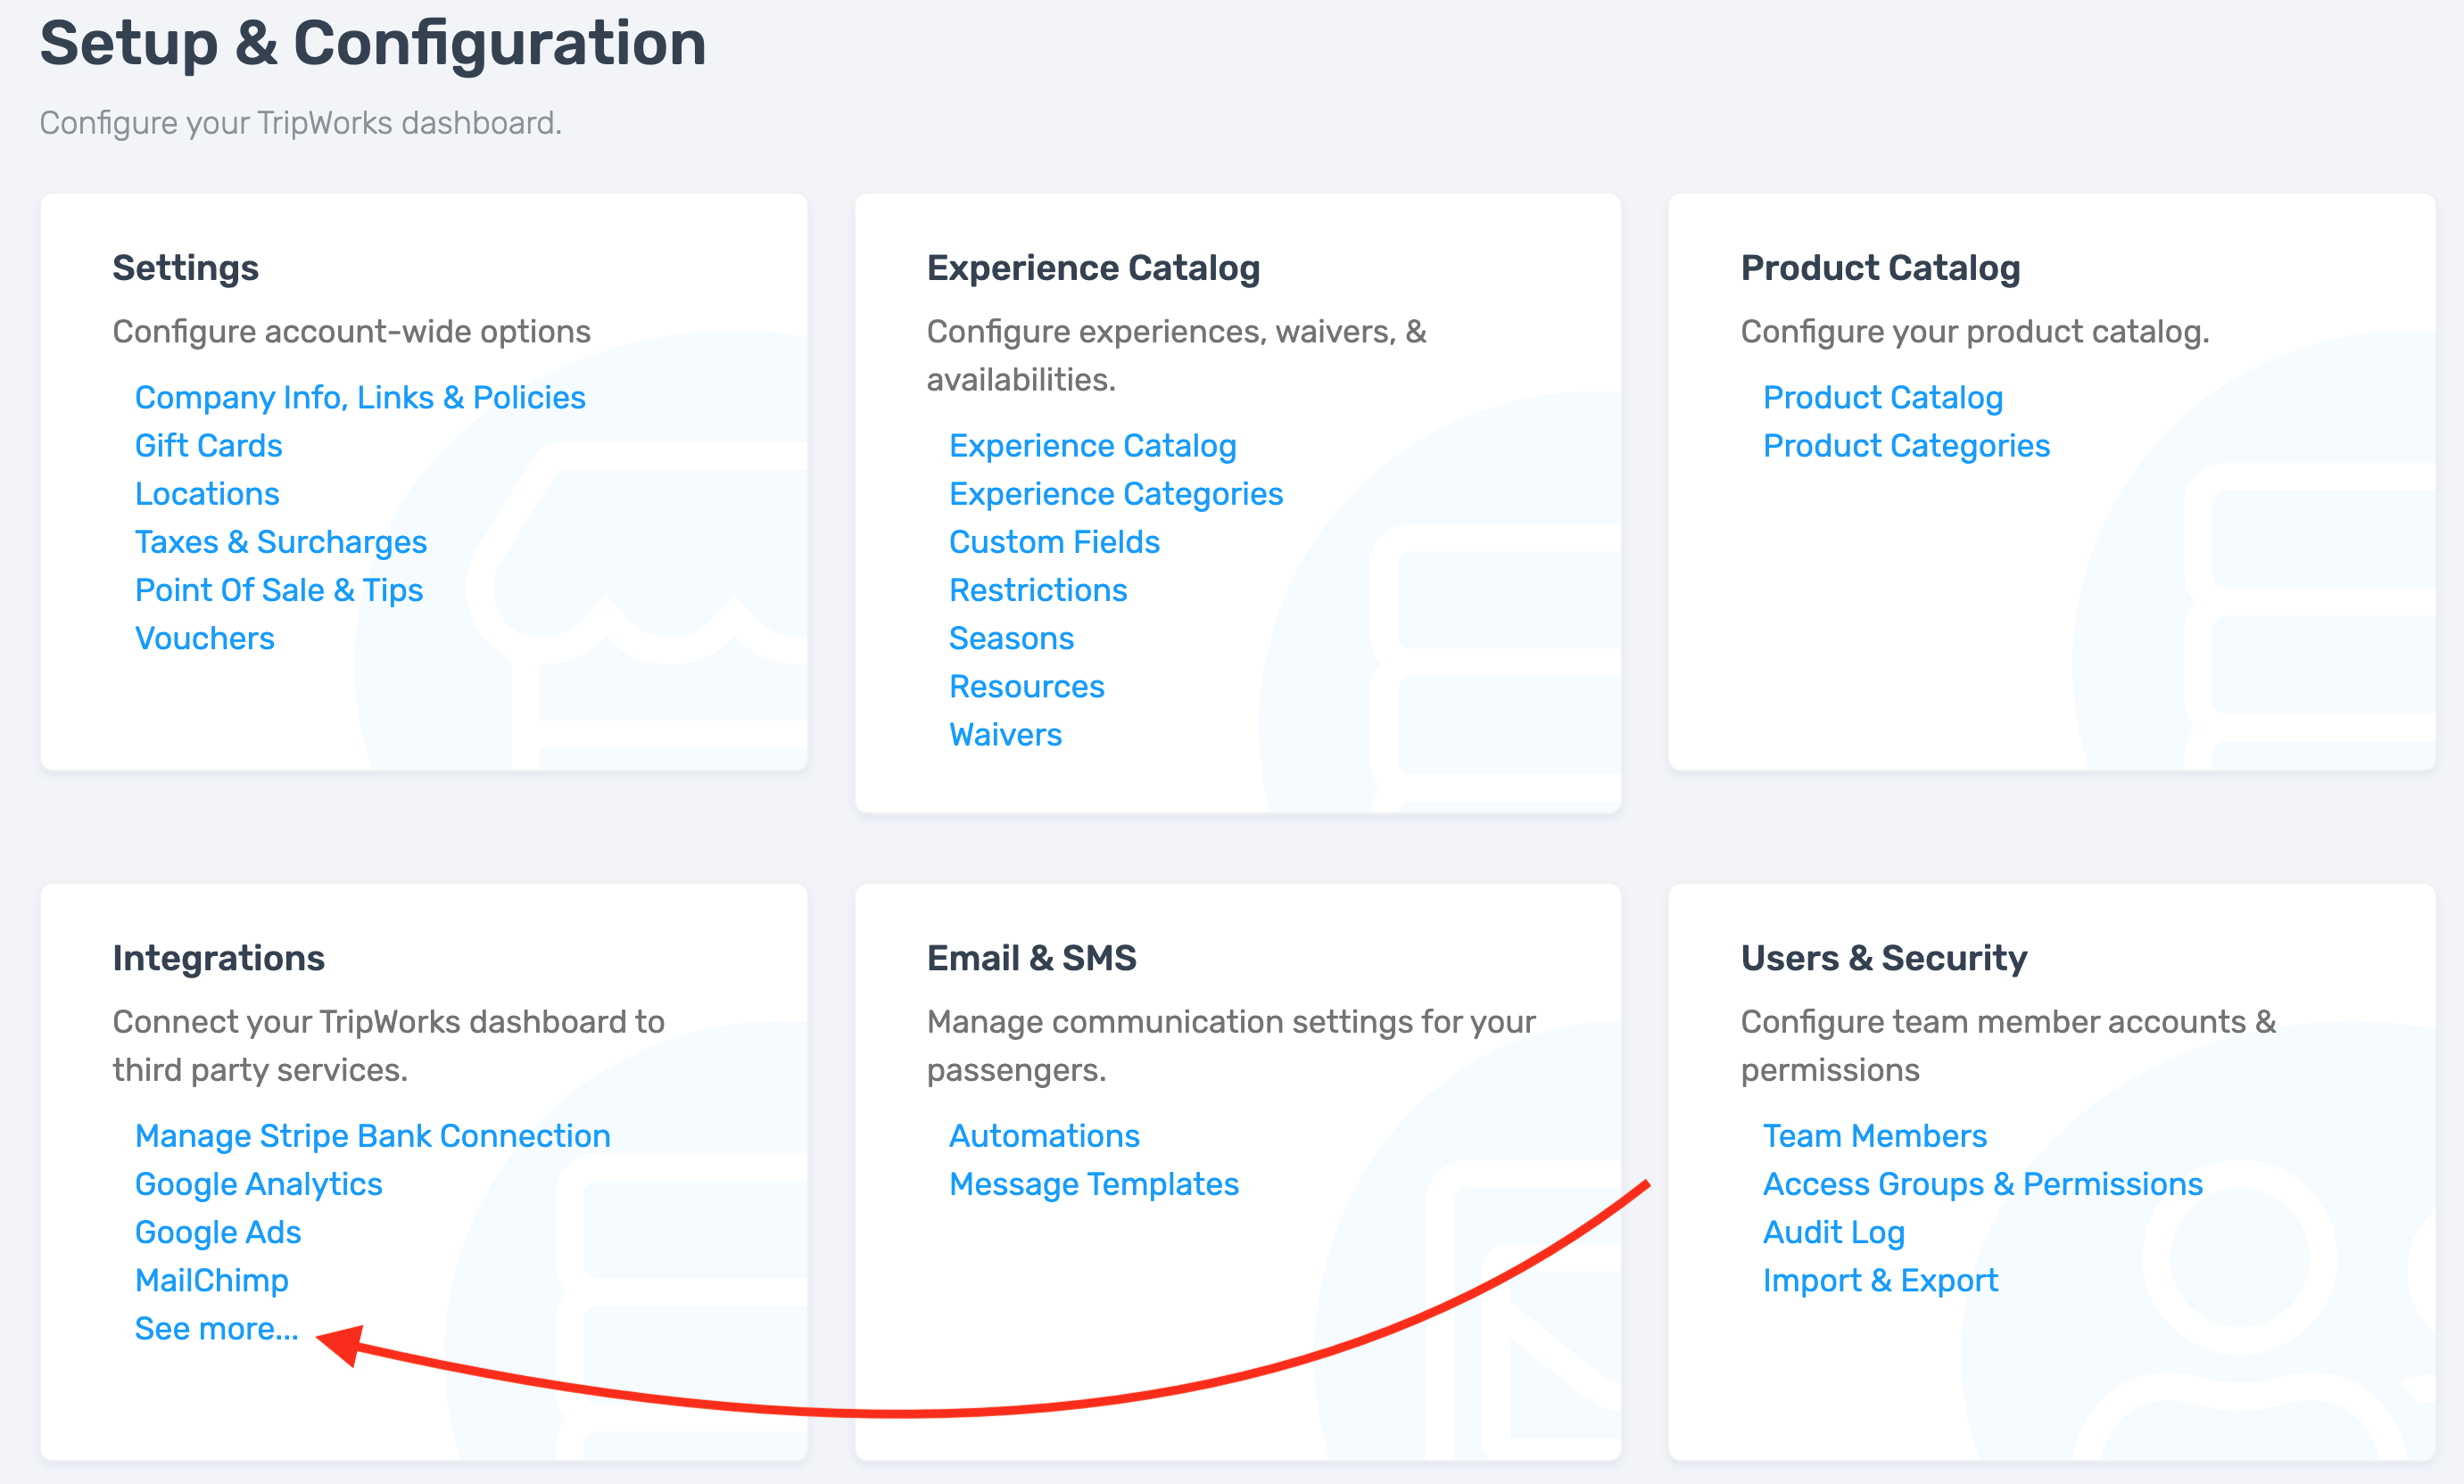
- Choose See more…under the Integrations section

- Locate the VQuip Integration section
- Enter your Client ID and Client Secret into the designated fields

- Choose Save to complete the setup
Once integrated, TripWorks will automatically send relevant reservation data to VQuip. You can review transaction logs within VQuip’s dashboard to verify successful data transfers.