
Custom fields are optional prompts you can add to your activities in order to collect additional information at checkout — from traveler demographics (height weight, shoe size, etc.) to activity preferences ("Which tour guide would you prefer?", "How many times have you done this before?", etc.) to miscellaneous details specific to your activity. Once a trip has been booked, your team can easily View & Edit Custom Field Responses as needed.
For each custom field you create, you can apply it to any and all activities for which it is relevant. In the screenshot below, for instance, we might apply the Weight and Height prompts to multiple activities, but it is likely that our Experience Level prompt will only be applicable for this unique biking activity.

How to Add Custom Fields to an Activity
- Select More > Discover More from the toolbar
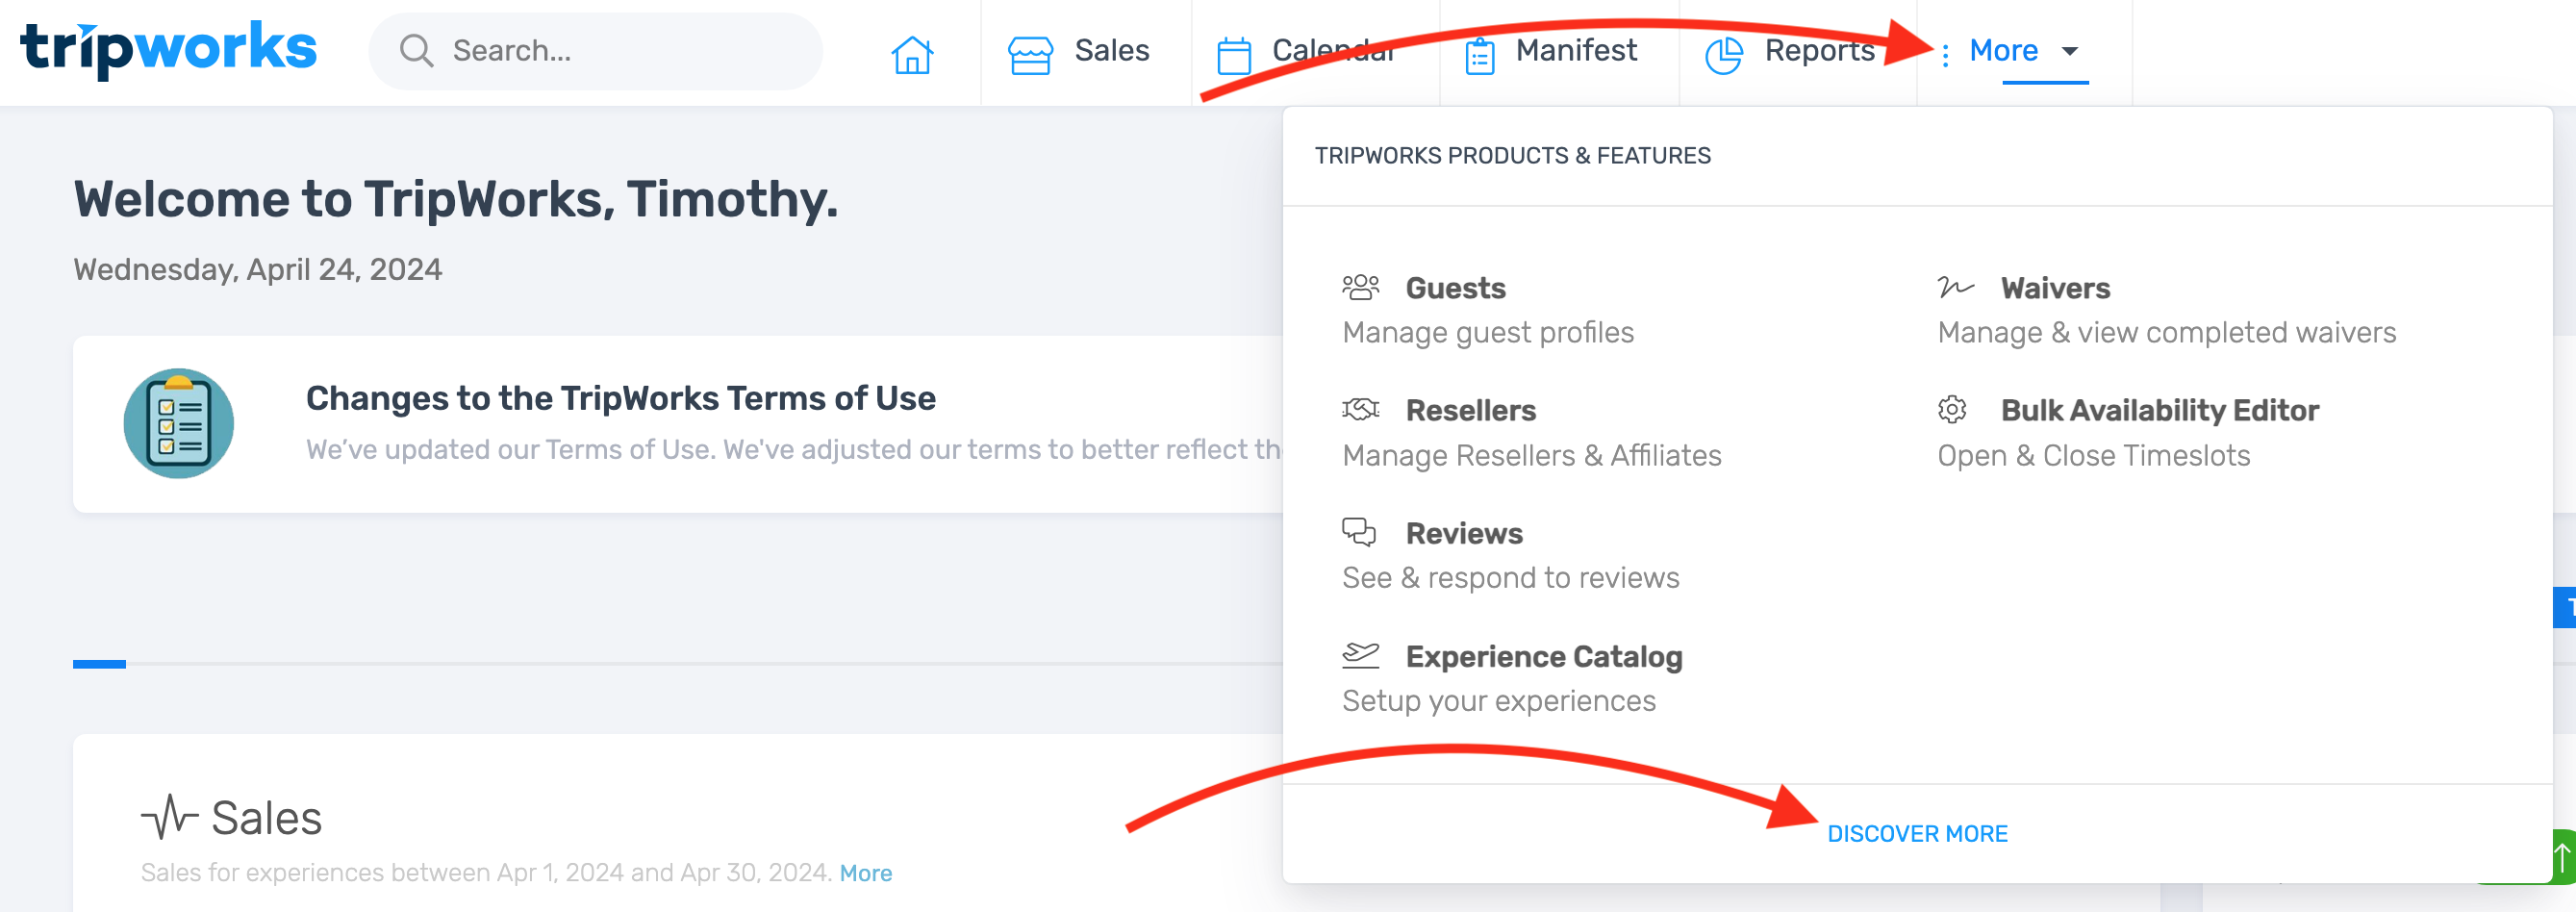
- Choose Custom Fields under the “Activity Catalog” section

- Select the Add Custom Field button

- In the Internal Name field, insert the name of the custom field as you want it to appear to your team when Viewing Custom Field Responses and other booking details

When you review booking details from the Manifest View, these internal names appear as column headings, which is why it is best to keep them short but clear

-
In the Title field, insert the name of the custom field as you want it to appear to customers booking their activity

↓

- Choose your desired setting from the Field Type drop-down menu. Depending on which option you select, other required fields will appear or disappear to ensure the field functions properly

-
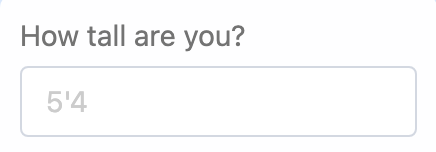
If desired, insert a sample response into the Hint field. During checkout, this hint will appear in light gray text within the text field, signaling to users that it is placeholder text and not an actual response to the prompt

↓
-
As needed, fill in the Description field with any special instructions, context clues, or other details that will help your customers better understand what kind of response you are looking for. During checkout, this description will appear directly below the text field

↓

- Choose your desired setting from the When to Show This Field drop-down menu

The "once for each trip" setting will cause the custom field to appear only once, at the end of the booking flow, regardless of how many travelers are included in the trip. This setting is ideal for scenarios in which you need one answer on behalf of an entire booking group, such as "Will you need transportation?" or “Are you celebrating a special occasion?

The "for each booking on a trip" setting will cause the custom field to appear for each individual traveler, early in the booking flow. When you need to know a certain detail about each traveler, such as shoe size, weight, or special needs, this is the setting to select

- Select all the activities to which you want this custom field to apply

- If you want the completion of this field to be mandatory in order to book the experience, select the Require all participants to enter a value for this field checkbox

- Select your visibility preference

If you'd like this option to be visible to logged in team members and online shoppers, select Public
If you want this to be a Private Custom Field — that is, a prompt visible to your team but invisible to e-commerce customers, select the Private: Only show to logged in users checkbox. This setting is beneficial when the field you've created represents a booking consideration that should be decided by your team, such as which tour guide to assign to each booking group
If you prefer this field is only visible to e-commerce shoppers, select E-Commerce
- Choose the Save button